❓ How to Move a Subtask from One User Story to Another in Atlassian Jira
Not sure how to move a subtask from one user story to another in Atlassian Jira? Check out our quick How To in Jira and learn to do so in a few simple steps!
Table of content
- Introduction
- When to Move a Subtask
- Step by Step Process of moving a single subtask
- Bulk Moving Subtasks

Introduction
Atlassian Jira is a powerful tool for managing projects and tracking issues. Sometimes, during the course of a project, you might find that a subtask created under one user story fits better under another. This could be due to changes in project scope, realignment of tasks, or simply a reassessment of where the subtask logically belongs.
When to Move a Subtask
Here are a few scenarios where you might need to move a subtask:
- Change in Project Scope: The project's direction has shifted, and the subtask now aligns more closely with a different user story.
- Reorganization of Tasks: During a project review, it's decided that certain tasks need to be reorganized under different user stories for better clarity or workflow.
- Error Correction: The subtask was initially created under the wrong user story by mistake.
Step by Step Process of moving a single subtask
Step 1: Locate the Subtask
- Navigate to the user story currently housing the subtask.
- Find the subtask you wish to move in the list of issues.
Step 2: Open the Subtask
- Click on the subtask to open its details.
Step 3: Move the Subtask
- Click the Actions button on the top - right hand side (represented with three dots) in the subtask's details view.
- Click on it and select "Move."
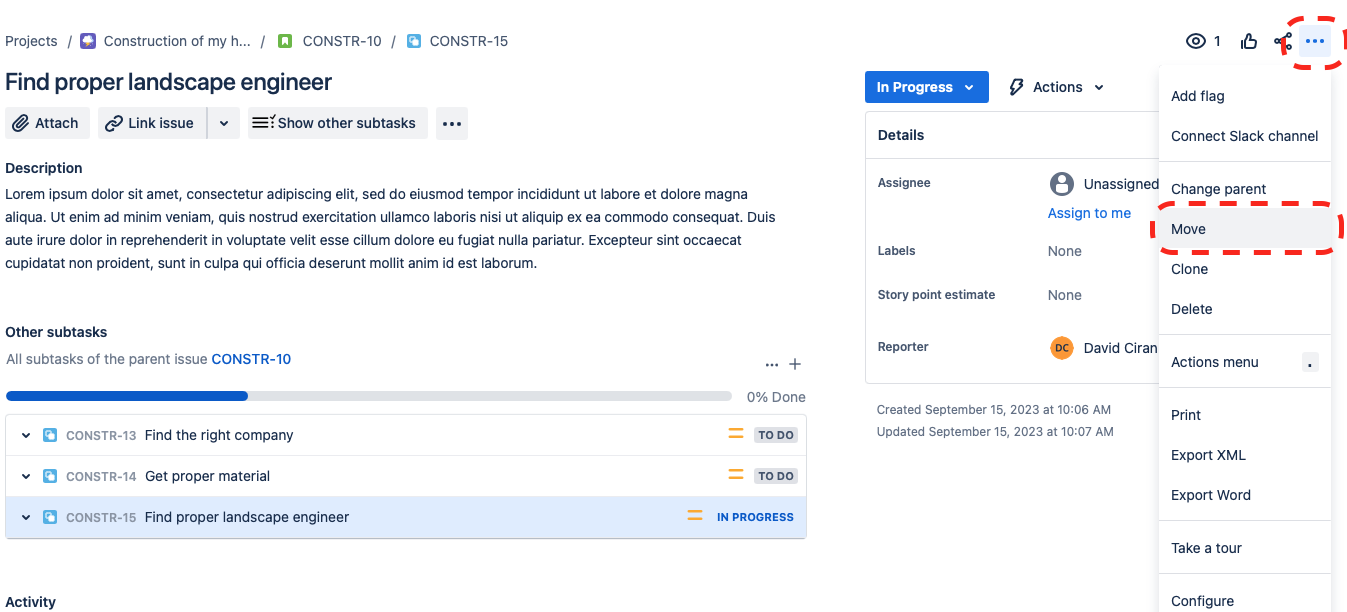
Step 4: Select New Parent Issue, Change Issue Type, or Project
- In the Move Issue dialog, you'll have several options. This is a crucial step where you can not only select a new parent issue but also change the issue type or move the subtask to a different project.
- Selecting a New Parent Issue: You can type the name or the ID of the user story to which you want to move the subtask. A list of suggestions will appear based on your input. Choose the appropriate user story from this list.
- Changing the Issue Type: If the subtask needs to be converted into a different type of issue (like a bug, task, or user story), you can do so in this step. Select the new issue type from the available options.
- Moving to a Different Project: Sometimes, a subtask might be more relevant to a different project altogether. In this case, select the target project from the drop-down list. Remember, the available issue types and workflows might differ based on the target project, so ensure that your subtask aligns with these new settings.
- After making your selection, click 'Next' to proceed. You may need to map fields or update certain issue attributes in the following screens, depending on the changes you're making.
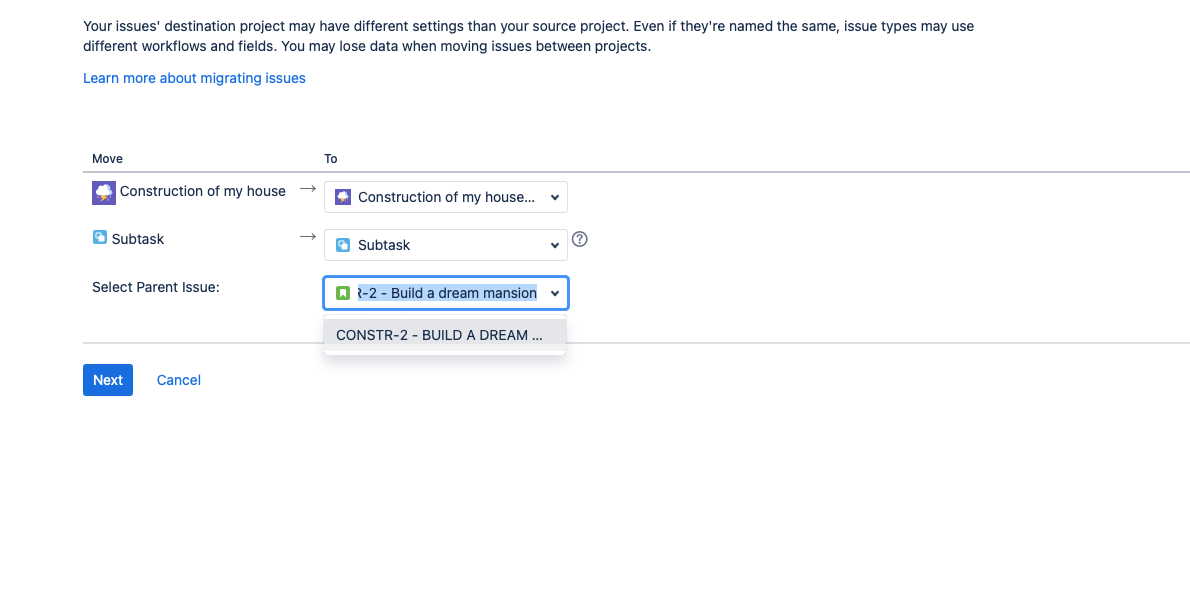
Step 5: Confirm the Move
- After selecting the new user story, confirm the move by following the on-screen instructions.
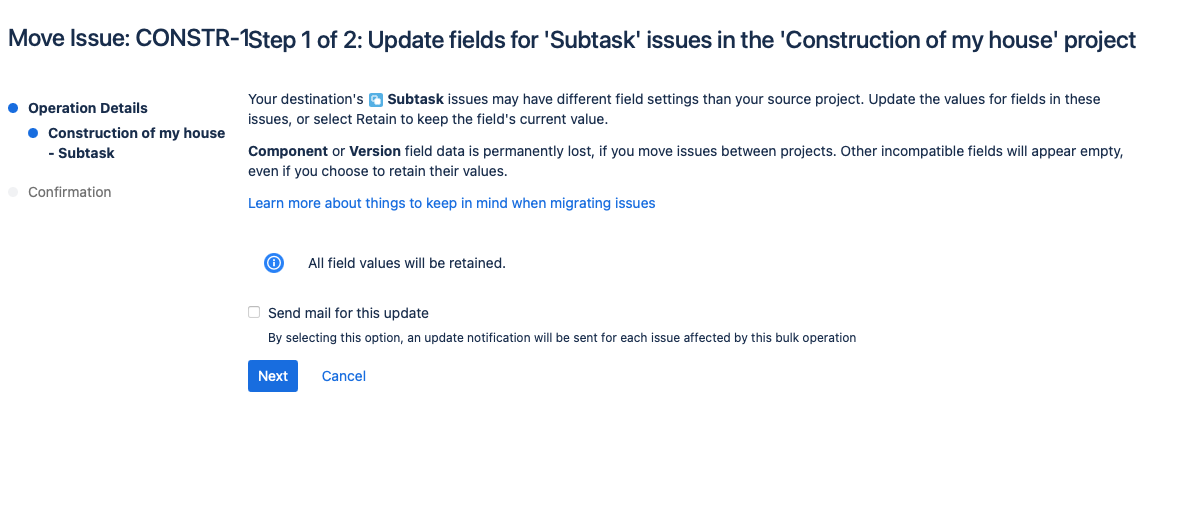
- The subtask will now be moved under the new user story.
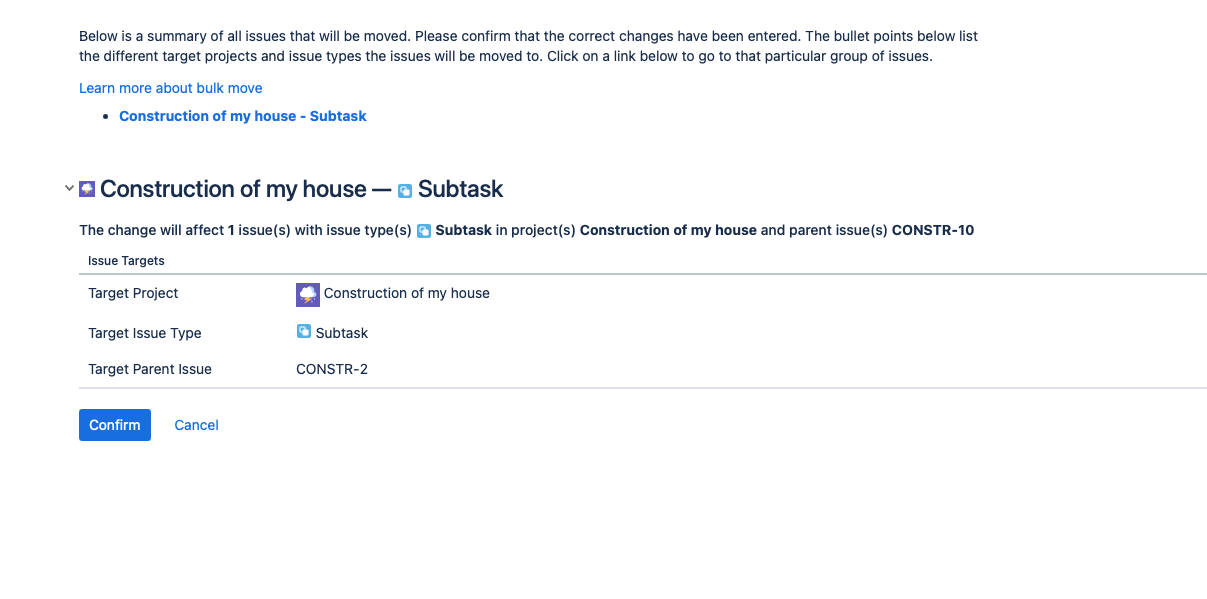
Step 6: Verify the Move
- Navigate to the new user story to ensure the subtask is now listed there.
- Check that all details and comments from the subtask are intact.

Bulk Moving Subtasks
In situations where you need to move multiple subtasks at once, Jira offers a bulk move option. This is particularly useful when you're reorganizing a large number of tasks or managing significant changes in your project.
Step 1: Access the Bulk Change Tool
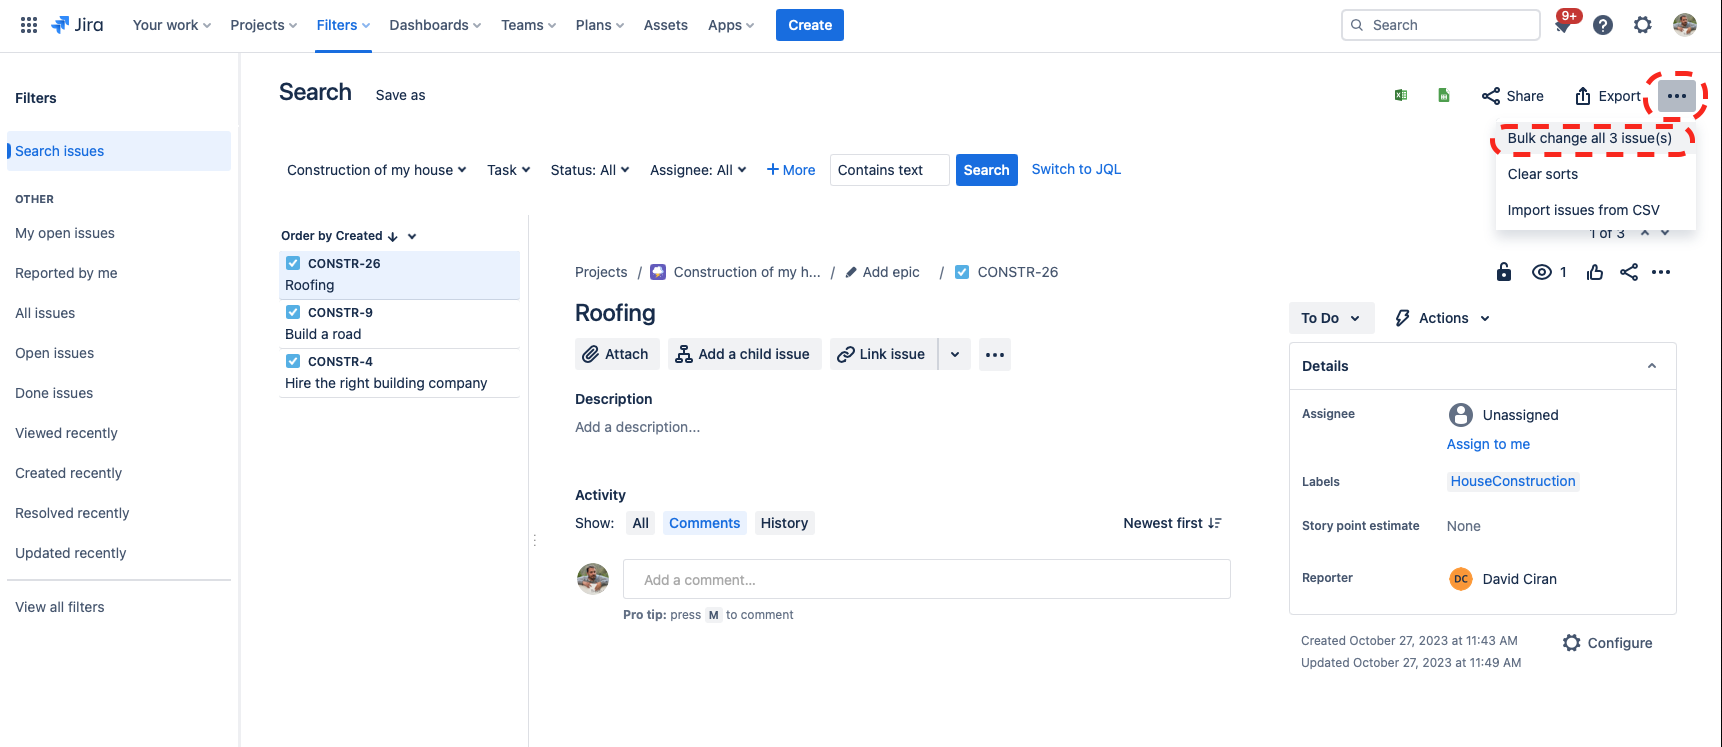
- From the main dashboard, use the search functionality to find the subtasks you want to move. You can use various filters to narrow down your search.
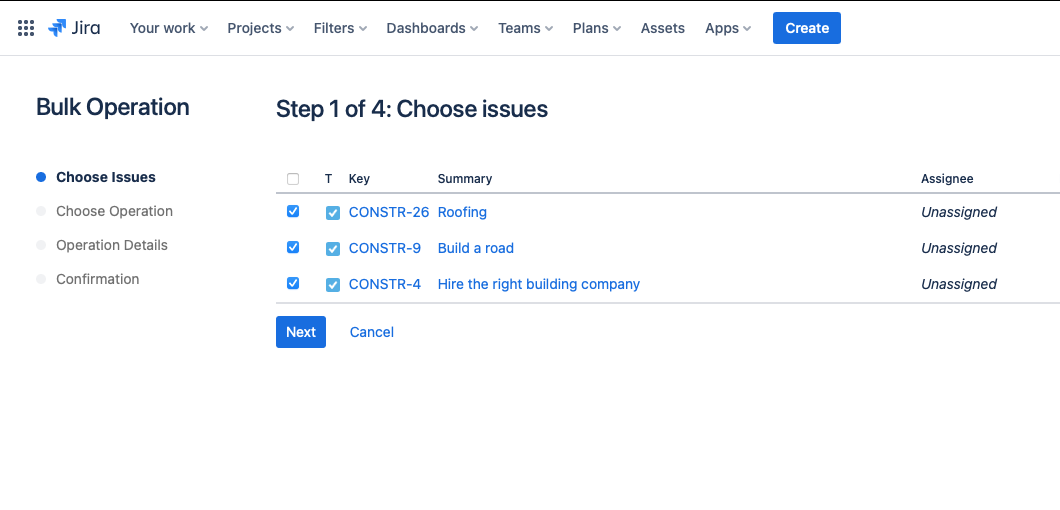
Note: Moving to another parent issue requires all selected subtasks to be under the same issue.
Step 2: Initiate Bulk Change
- Look for "three dots" button on the top - right hand side. Click on it and select "Bulk change ..."
- Select "Move Issues" from the bulk operations menu.
Step 3: Choose the New Parent Issues
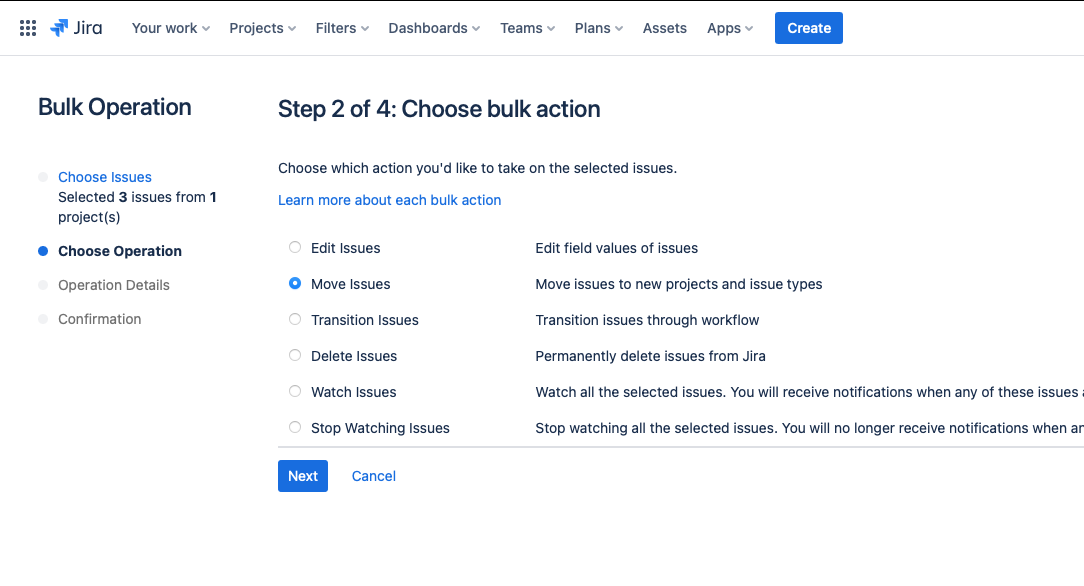
- In the Bulk Move wizard, you will be prompted to select parameters of the move similar to moving the single subtask described above.
Step 4: Review and Confirm
- Review your changes to ensure each subtask is being moved correctly.
- Confirm the move by following the on-screen instructions.
Step 5: Verify the Bulk Move
- After completing the move, navigate to each new user story to ensure all the subtasks have been correctly reassigned.
- Check that all details and comments for each subtask remain intact.