❓ How to Create Subtasks
Creating subtasks in Jira can greatly improve your team's efficiency and organization. In this How to post we will teach you how to create a subtask in Jira!
Table of content

Creating subtasks in JIRA can help you:
1. Divide larger tasks into manageable chunks.
2. Assign multiple team members to different aspects of a task.
3. Better track progression and completion of tasks.
4. Provide a clearer, more detailed project overview.
Step-by-step guide on how to create a subtask in JIRA
This guide assumes you already have a JIRA account and have full permissions to create and edit tasks.
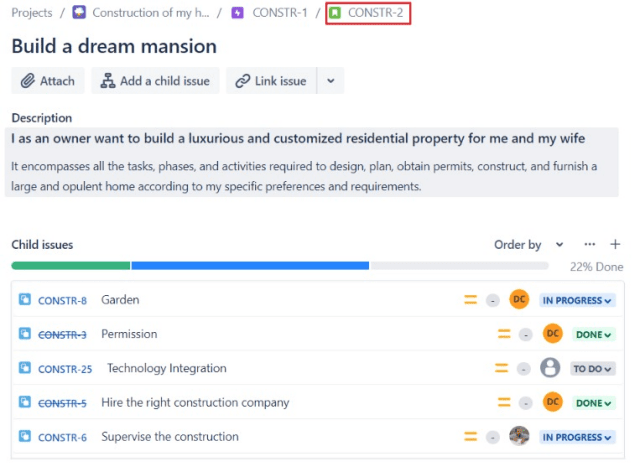
1. Navigate to the parent issue where you want to add a subtask
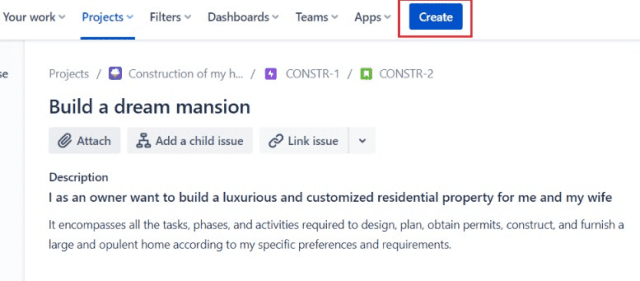
2. Select 'Create' at the top menu
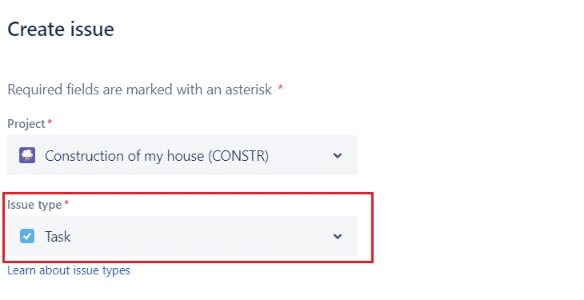
3. Choose the issue type to be 'Task'
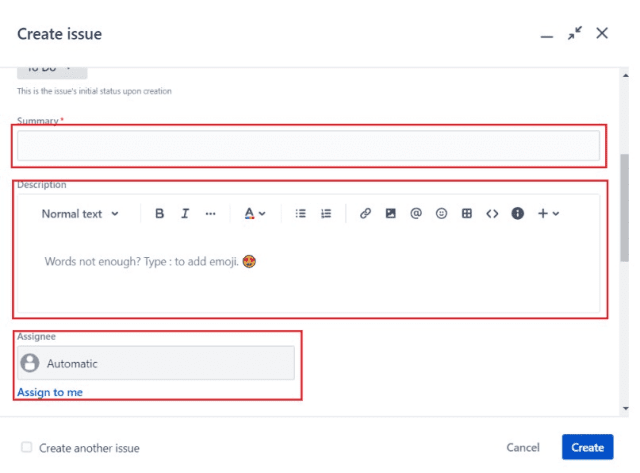
4. Fill in the details of the subtask - including the task title, description, assignee and due date
5. Click on the 'Create' button to finish
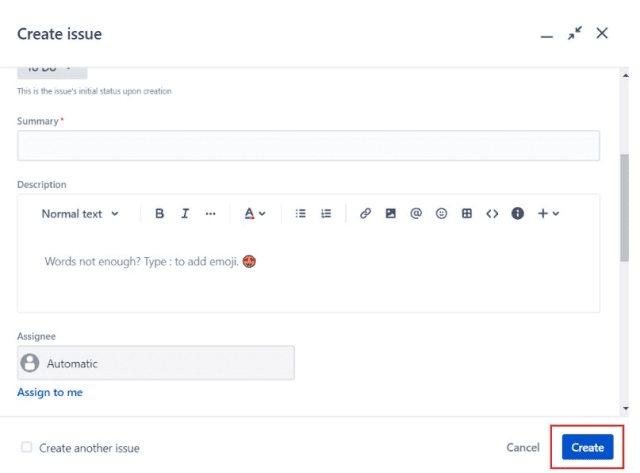
Creating subtasks in Jira is a straightforward process, an effective way of breaking up large tasks into smaller, manageable parts. This allows for better task management, organization, and tracking, making your project management easier.
If interested in learning more about subtasks visit our blog post Mastering Jira Subtasks: A comprehensive Guide